
Putting the cart before the horse a bit here, as I haven’t been writing much lately, but I got this education market ARM Chrome tablet pretty cheap and followed some instructions to get it fully converted to Linux. ChromeOS is gone. It’s running Debian Trixie via the “velvetOS” project. I could’ve just used the Linux container in chrome OS, but everything has such high guardrails that even the most minor of customizations got very frustrating. Anyway, I specifically picked the 10E because it was known to at least mostly support Linux.
Some limitations, as the camera doesn’t work, I don’t think the external speakers work (could be specific to this particular boot image), and on full boot I have to manually rotate the screen to make sure the touchscreen coordinates stay aligned with the display. Otherwise it works surprisingly well.
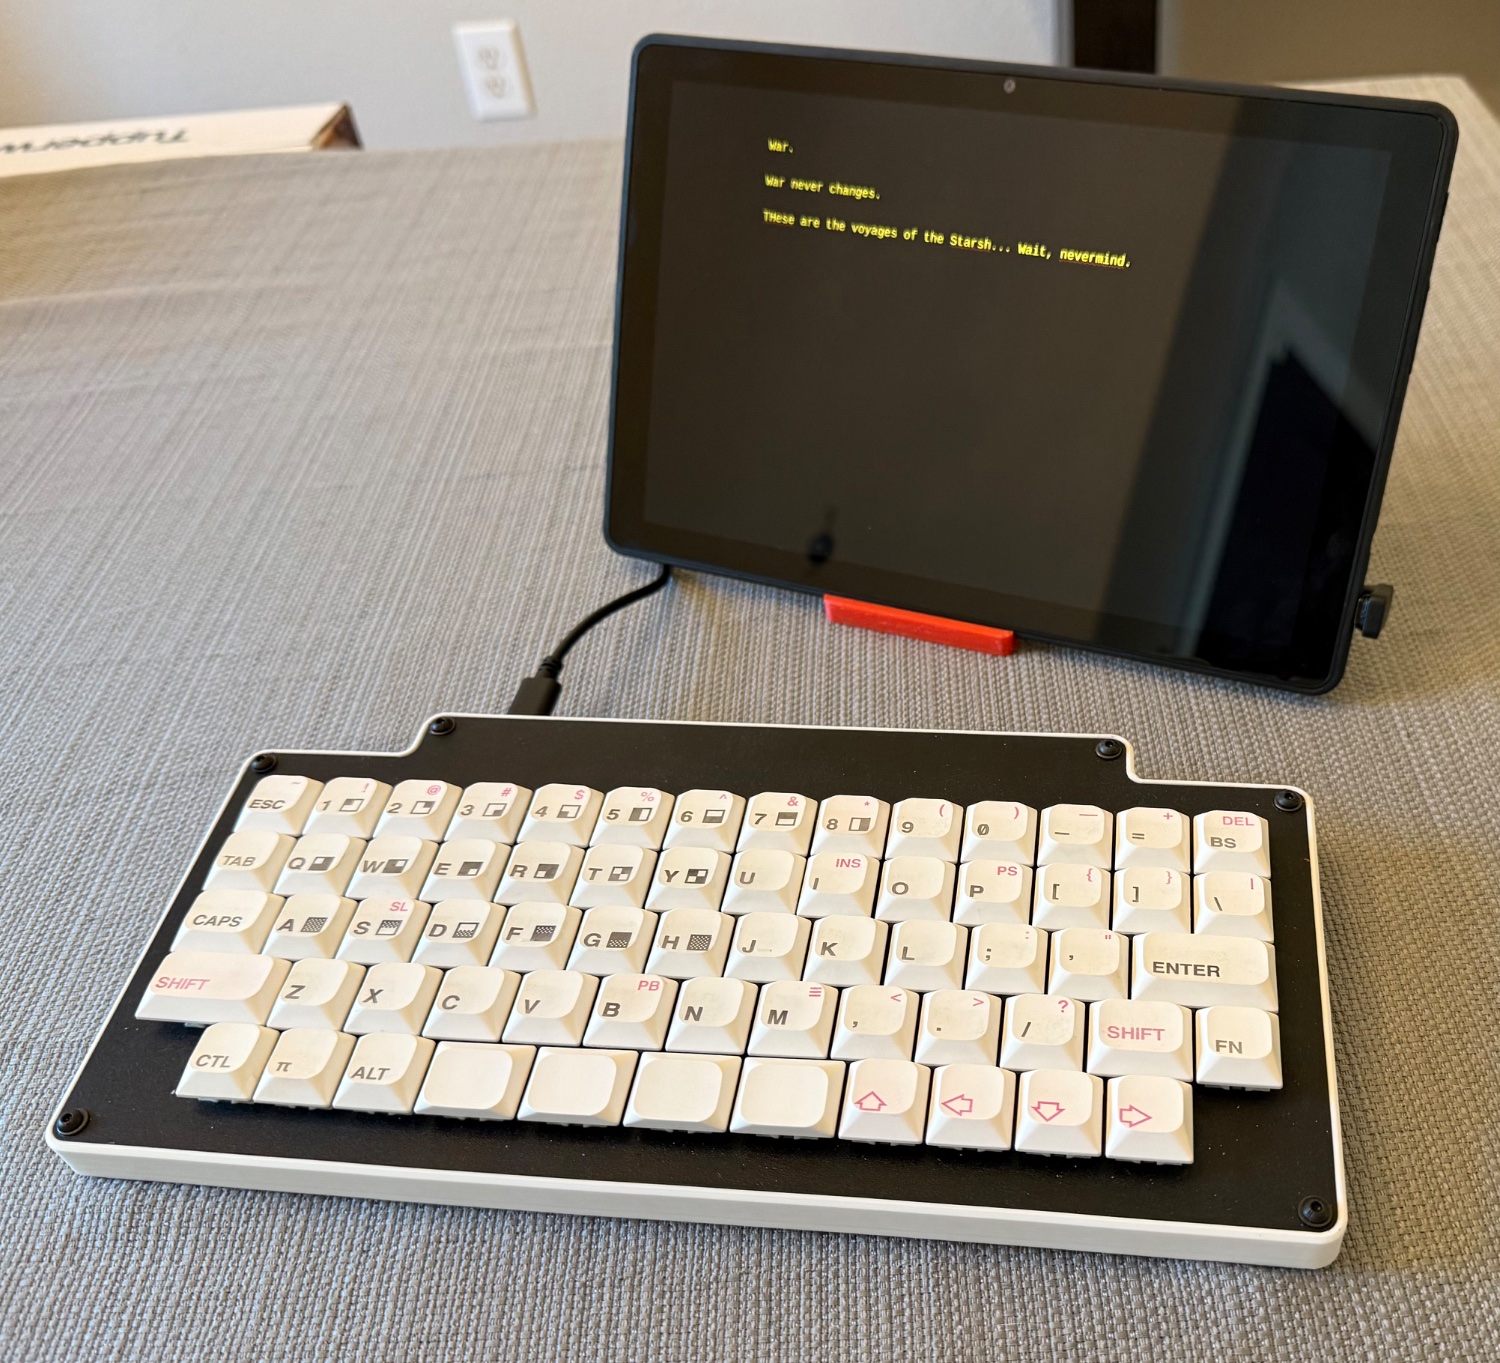
Firefox is probably too slow on this old MT8183 with 4 GB of RAM, but it is much faster on the EMMC install compared to the USB, and it was not torture to go online and grab a couple of files directly. The word processor is Focuswriter with their green theme tweaked to amber and it runs perfectly. Suspend/resume is working well enough with auto-login that I can just leave Focuswriter up. Battery life is an open question, but before I wiped it, Chrome OS reported it had 96% battery health 🤷. With a mobile-grade SoC, and with Bluetooth and Wi-Fi turned off, I’m optimistic it won’t be too bad.
I also fixed up one of my DIY mechanical keyboards, and I think it’s a pretty nice little writing setup. Right now, I just have Wi-Fi turned off, but I could theoretically strip out the drivers altogether, or (if I remember correctly), even take the Wi-Fi module out of this one. I opened it briefly to short out the hardware write protection on the firmware, but forgot to look for the Wi-Fi card. As an aside, this was by far the easiest I could imagine a tablet being to service — zero glue connecting screen to case.
For the layout, KLE is the old standby and is used by several other tools. You can then import THAT into a plate generator, the one HERE by ai03 (fairly well known designer in the small world of keyboard people) is probably the best and most reliable. That will let you generate DXF files for your cutter. At it’s simplest, a switch plate, a bottom plate, and some standard brass standoffs are enough to make the physical structure. Once you have the dimensions, though, it’s not TOO hard to design a 3D printed case or a more sophisticated set of slices to go on your laser (LibreCAD, Inkscape, or even direct in Lightburn IIRC), and acrylic stack cases are very much a thing, though not so much in vogue as commercial products anymore. The board in this post started as a completely Masonite build, because my little 5W diode could cut it reasonably well. It was only in the last week or so that I took it apart and replaced the laser-cut standoff spacers with a 3D printed version with a sidewall to make it look slightly more like a finished keyboard.
For wiring, I sort of play in the kiddie pool. Most of my boards are hand-wires, and there as many tweaks to the formula as there are makers, but THIS older set of posts from Matt3o (another well known designer) is as good as any for the basics. I find Raspberry Pi Picos and other RP2040 clones easier to work with, but YMMV and the concepts are the same. I have done two PCBs. Both of them are just traces and through-holes. The first one just has a spot to run wire to a Pi Pico or other dev board. The other adds a few spots for indicator LEDs and actually crams in a spot for Pi Pico compatible board, which means it’s easier to keep my firmware on hand. For firmware, KMK is in interpreted python and is very easy to set up, but QMK and its tweaked versions for the VIA and VIAL graphical remapping software are more sophisticated and extensible.
I had to learn KiCAD well enough to muddle through (and the second PCB does have a few errors, but not enough that I had to scrap them, thank goodness). More clever people than I, actually design proper PCBs with the microcontroller and necessary components included during fabrication, and there are custom keyboards all over github with KiCAD files to look through (the “GH60” is the classic example). There are even plugins to take a schematic view in KiCAD (the line diagrams of circuits) and populate the actual physically-representative footprints based on KLE data. There are also customized libraries of keyboard-switch footprints that are a little nicer than the ones built into KiCAD (though there ARE usable ones built in).