
Hi everyone,
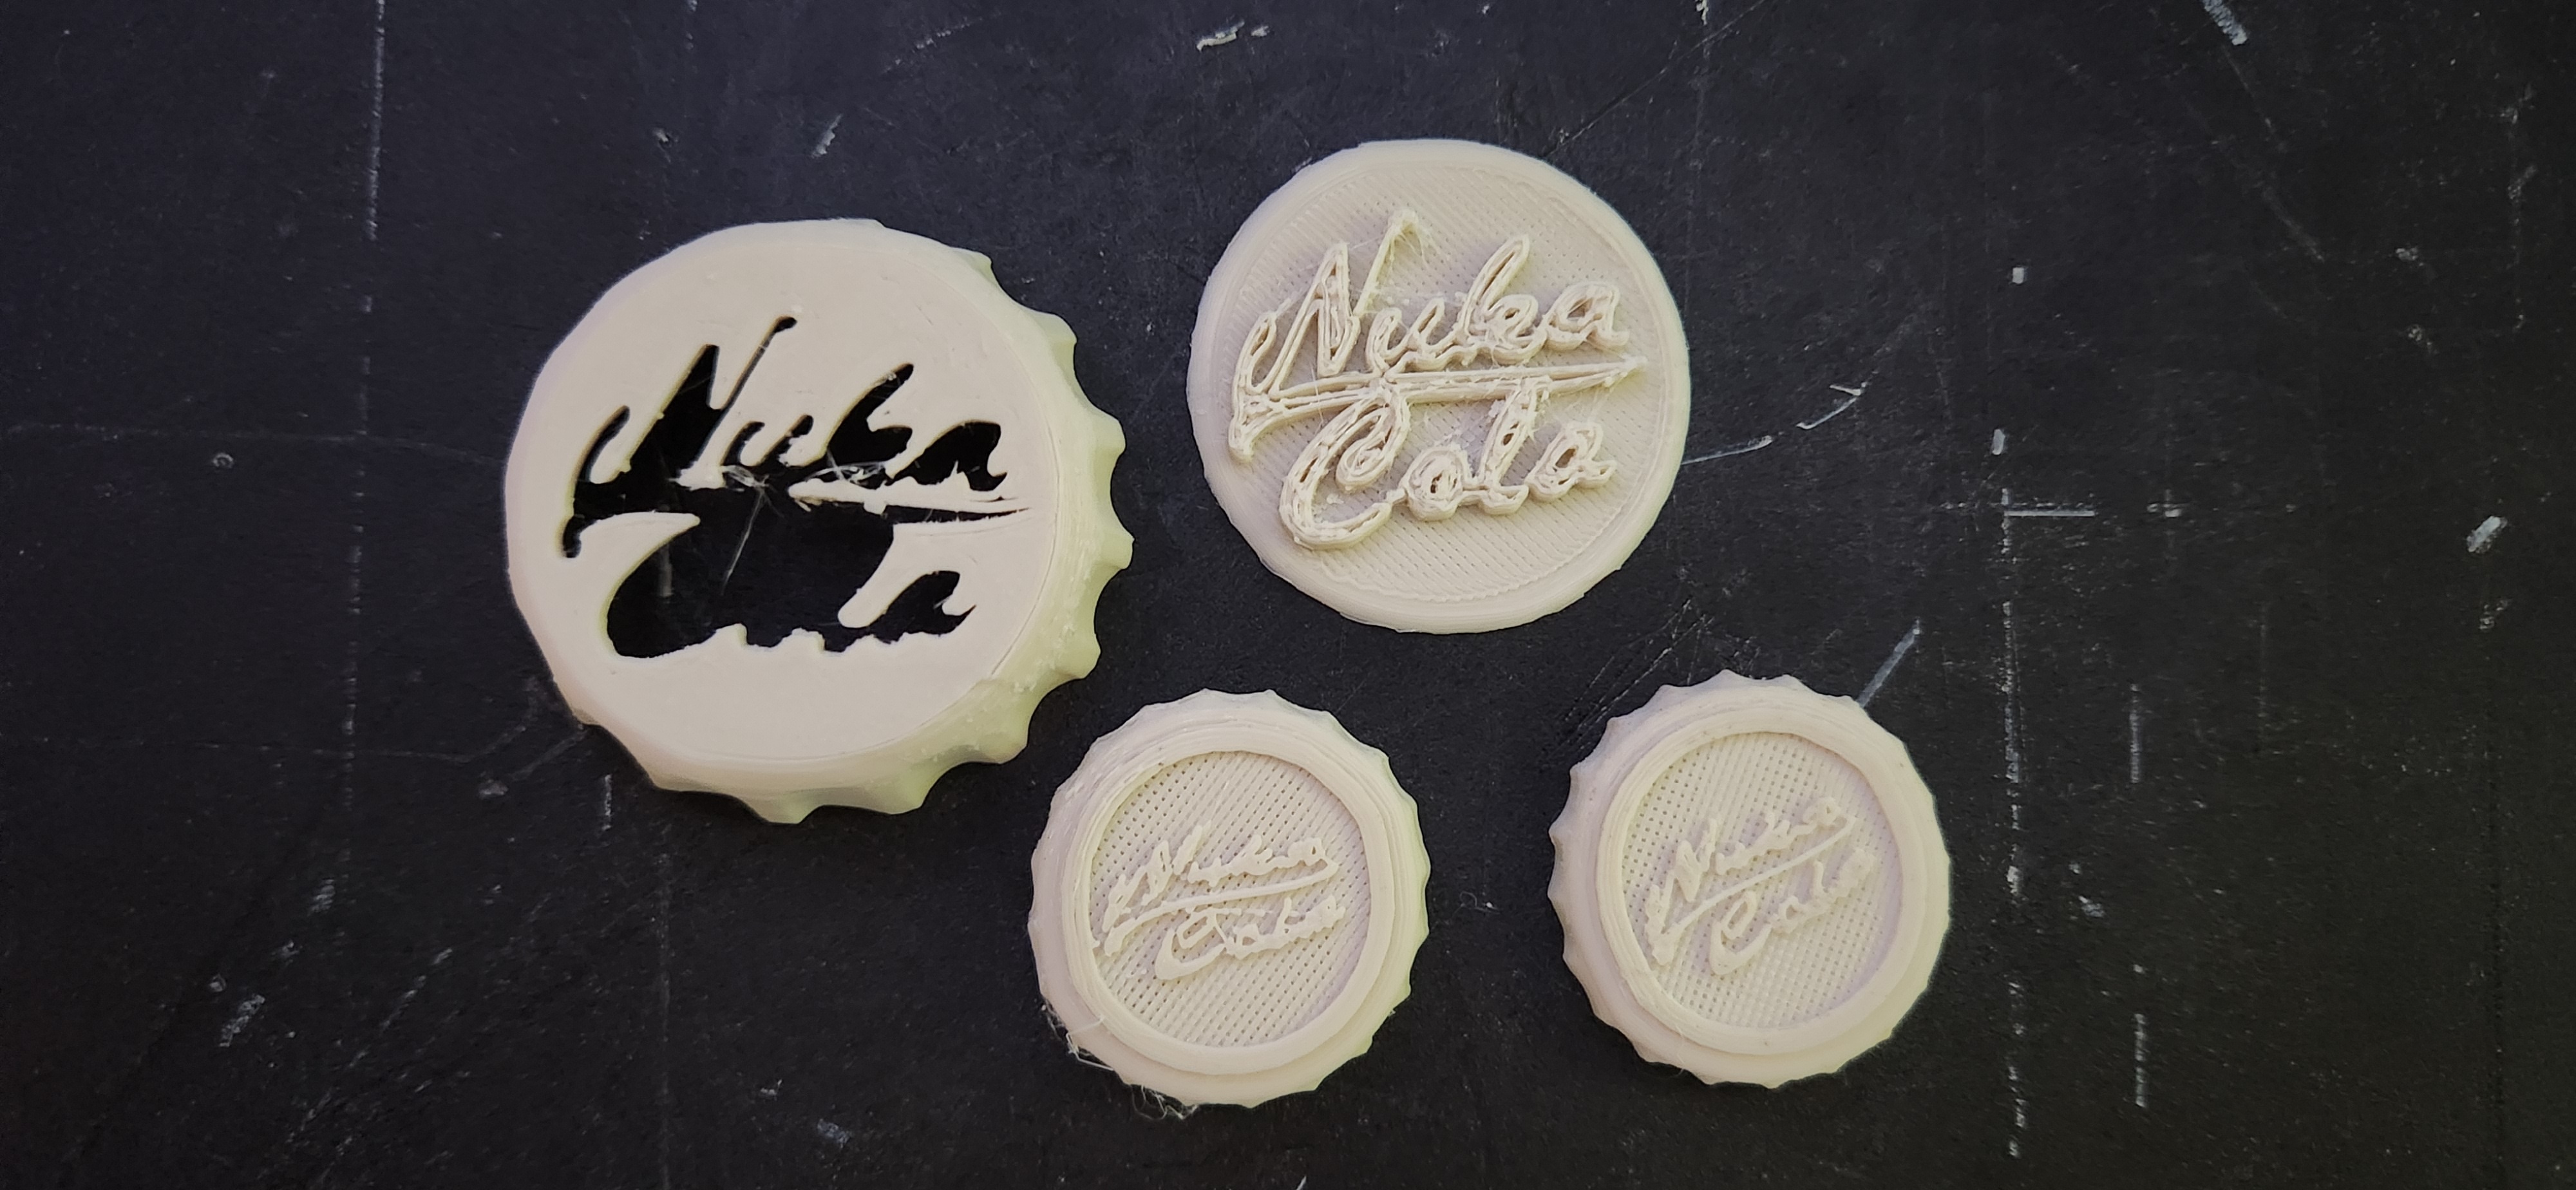
I’m having a weird issue with text such as the one in this image. Big or small, fancy or regular, all text comes out looking like it does in the image - cracked and hollow. I’ve spent the last few days trying to figure out why, and I’m stumped.
I’ve tried printing slower and slower and adding more and more top layers (the bottom 2 bottle caps are completely solid with 100% infil), but it doesn’t seem to fix the issue.
Here’s what I’m working with:
- Ender 3
- Software 2.0.8.27
- Hardware 4.2.2
- CR Touch
- PrusaSlicer 2.8.0
- MakerBot PLA Filament
- I’ve used various temperatures and speeds. All of them have generated the terrible text you see here
Thanks in advanced for the help!
Update: We seem to be getting somewhere!
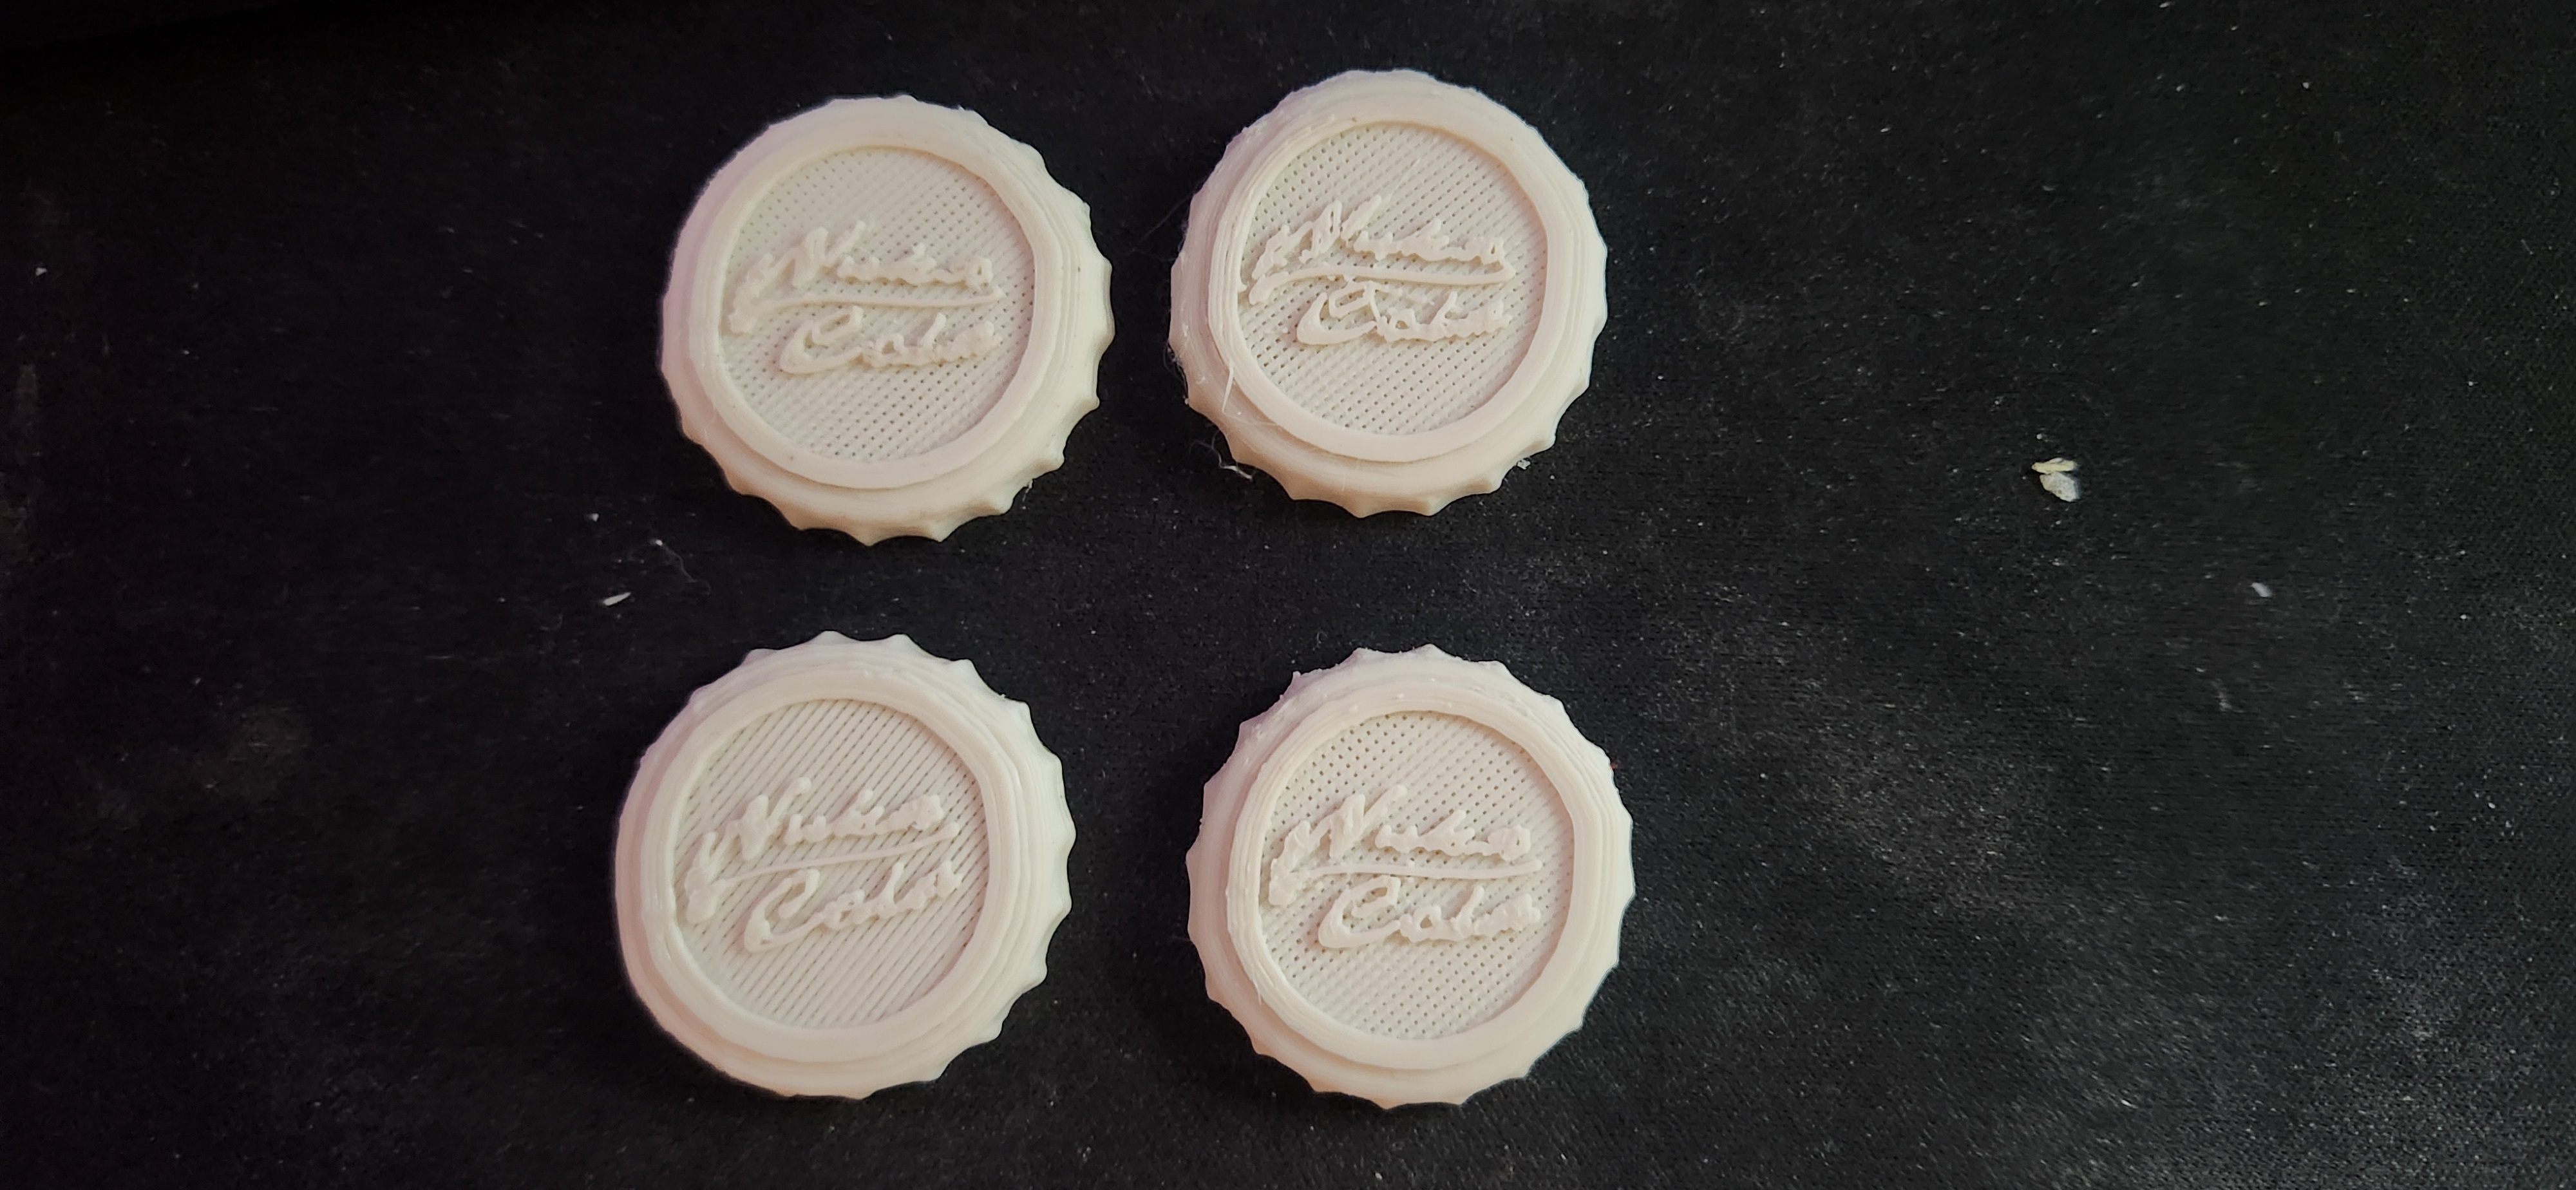
The top 2 are the same ones featured in the post above. The bottom left was printed at 110% extrusion and normal speed. The bottom right was printed at 110% extrusion and a much slower speed for the text, and it looks much better! I’m printing another now with higher bridge flow rate (it was 70%, I set it to 85%), so I’ll update again in a few minutes when that finishes!
Thanks for the information about calibrating e steps from everyone! It’s getting late, so I don’t want to mess around with that tonight, but I’ll give it a shot tomorrow!
Update 2: welp.

That’s possibly the worst one yet. I’m reprinting the bigger insert piece seen in the original post to check if my printer simply can’t do that quality or if it’s the e steps. If it’s e steps, I’m going to bed…
Update 3:
Welp, seems like it’s the e-step. However, it’s too late for me to care about that right now, so I’m going to bed. Thanks for the help everyone! I’ll work on fixing the issue tomorrow
The bottom two which are supposed to be completely solid aren’t even filling in the caps themselves. You’re not getting enough filament flowing through the nozzle. Are you using a 100% flow rate in your slicer? You might try printing at 110% with a one- or two-layer solid test to see how well it fills in.
If you have never calibrated your e-steps, you’ve probably been under-extruding and just never noticed the problem on previous prints. Always a good idea to check this if you haven’t before. This might be solved by adjusting the flow rate, but it’s better to properly calibrate your printer or you will still see problems in some areas.
Alternatively, you might have a partial clog in the nozzle. Try doing a cold-pull to remove anything that’s in there and see if it clears up the problem. No changes in the slicer will resolve this, it’s a mechanical problem.
It’s probably also worthwhile to measure the filament with calipers to see how close to 1.75mm it actually is. If you previously had a spool that was slightly over, it might have been covering up the defects that would be more obvious when using a spool that is slightly under. This problem can be solved just by adjusting the flow rate in the slicer.
You said you have made changes to the temp and speed, but didn’t say what settings you are using or have tried. Please post that info (along with anything that may have worked in the past) for reference. Also are you sure you got pure PLA, or is it a variant like PLA+?
So despite having this printer for a while, I’m unsure of what a few things you’ve asked.
First, the stuff I know how to answer:
The main thing I don’t understand is calibrating e-steps. I’m unsure of what an e-step is.
Thanks for the quick (and detailed!) reply!
For calibrating your printer, I always recommend https://teachingtechyt.github.io/calibration.html. Everything is step-by-step and helps teach you about the calibrations and what different settings do. I agree with the other commenter that you’re underextruding, based on your layers not filling in. Getting your E-steps calibrated is extremely important, then I’d start working on flow rates (which can change between rolls and brands)
You’ll want to google the exact steps for calibrating e-steps, but basically this is the setting that determines how many steps of the stepper motor are required to move the filament a given amount. You disconnect the bowden tube from the head, then push the filament through so a bit is exposed past the end of the tubing and mark exactly where the end of the tubing is on the filament. Now from your slicer you instruct the printer to extrude 100mm of filament, and very carefully measure how much actually comes out. If you have exactly 100mm then great, but typically you will find it off by a few mm (and in your case it’s probably less than 100mm). It doesn’t take much to cause a big problem. Any how-to page will show how you can read the current setting (I think it’s 92 steps by default), and there are formulas which will calculate the new number you need to change that to.
So the idea here is that if the slicer thinks it should be outputting 100mm of filament, but it only pushes 95mm instead, you won’t have enough filament to fill in the gaps. Setting the correct value on the printer will fix this, and then you can adjust more minor issues by changing the flow rate in the slicer. You will also note that different types or brands of filament extrude at slightly different rates, which is why your slicer may allow different profiles for the filament itself.
I’m not familiar with PrusaSlicer. Cura has always worked well for me, it’s free, and it provides quite a lot of options for fine-tuning your prints. If you find that Prusa doesn’t let you adjust the filament rate, give Cura a try.
I’m reprint the bottom 2 caps now using the profile I did the bottom left in, but now with 110% extrusion! Wish me luck!
You should only need to see a few layers to tell if there’s still a problem. No need to waste filament printing a complete failed piece.
Oh I should have mentioned in the previous post… if a cold-pull doesn’t make any difference, have you checked the nozzle itself? It’s a very tiny hole, easily damaged, so if the head smacked into anything it might have slightly crushed the tip (not something you would see by eye). You could also try clearing the nozzle with the long needle that came with the printer – if it doesn’t fit into the nozzle tip then it’s almost certainly suffered some damage. Always keep a bag of spare nozzles on hand!
The Nozzle’s recently been changed from one I managed to completely clog, as well as having been thoroughly cleaned. When I got this thing up and running again, I did everything shy of a complete reassembly for cleaning. I’m not sure about the crushed tip part. I’ve long since lost the needle that came with the printer, but I can run out to Walmart tomorrow and grab a new one to check.
I’m also just using these bottlecaps as markers that only I’ll be able to see, so their overall quality isn’t super important, I just want to improve future prints, and this lets me test out text quality. Figured I’d just knock out 2 birds with one stone!
That works, just keep testing changes until you figure it out.
May be a stupid question, but are you hearing any clicking from the extruder while printing? If the brass gear gets clogged up it can start slipping. Or if there’s not enough tension on the spring it might not push the filament through reliably. For that matter have you printed an arm to change the angle the filament feeds into the extruder (if you still have the spool in the stock position on top of the printer)? There are many better ways to handle that issue, but original setup causes a lot of friction and you’ll actually see the filament cutting a groove into the extruder, and the arm is the easiest print to solve it. You pretty much want to check everything that might be causing the filament to drag or not allow it to feed smoothly into the head.
I’m seeing a few filament guides for the ender 3 on thingiverse. Would you recommend either of these?
https://www.thingiverse.com/thing:2920344
https://www.thingiverse.com/thing:2917932
The second one with the blue arm is the style I was talking about. It changes the angle so the filament doesn’t get pulled into the extruder at a right-angle. It will help for now, but there are other models that use a ball bearing for a spinning wheel that the filament rolls over. And if you really want to make it smooth, there are ball bearing rollers so the whole spool spins more freely. That’s one of the things I love about this printer, there is such a range of mods you can print to make the whole machine better.