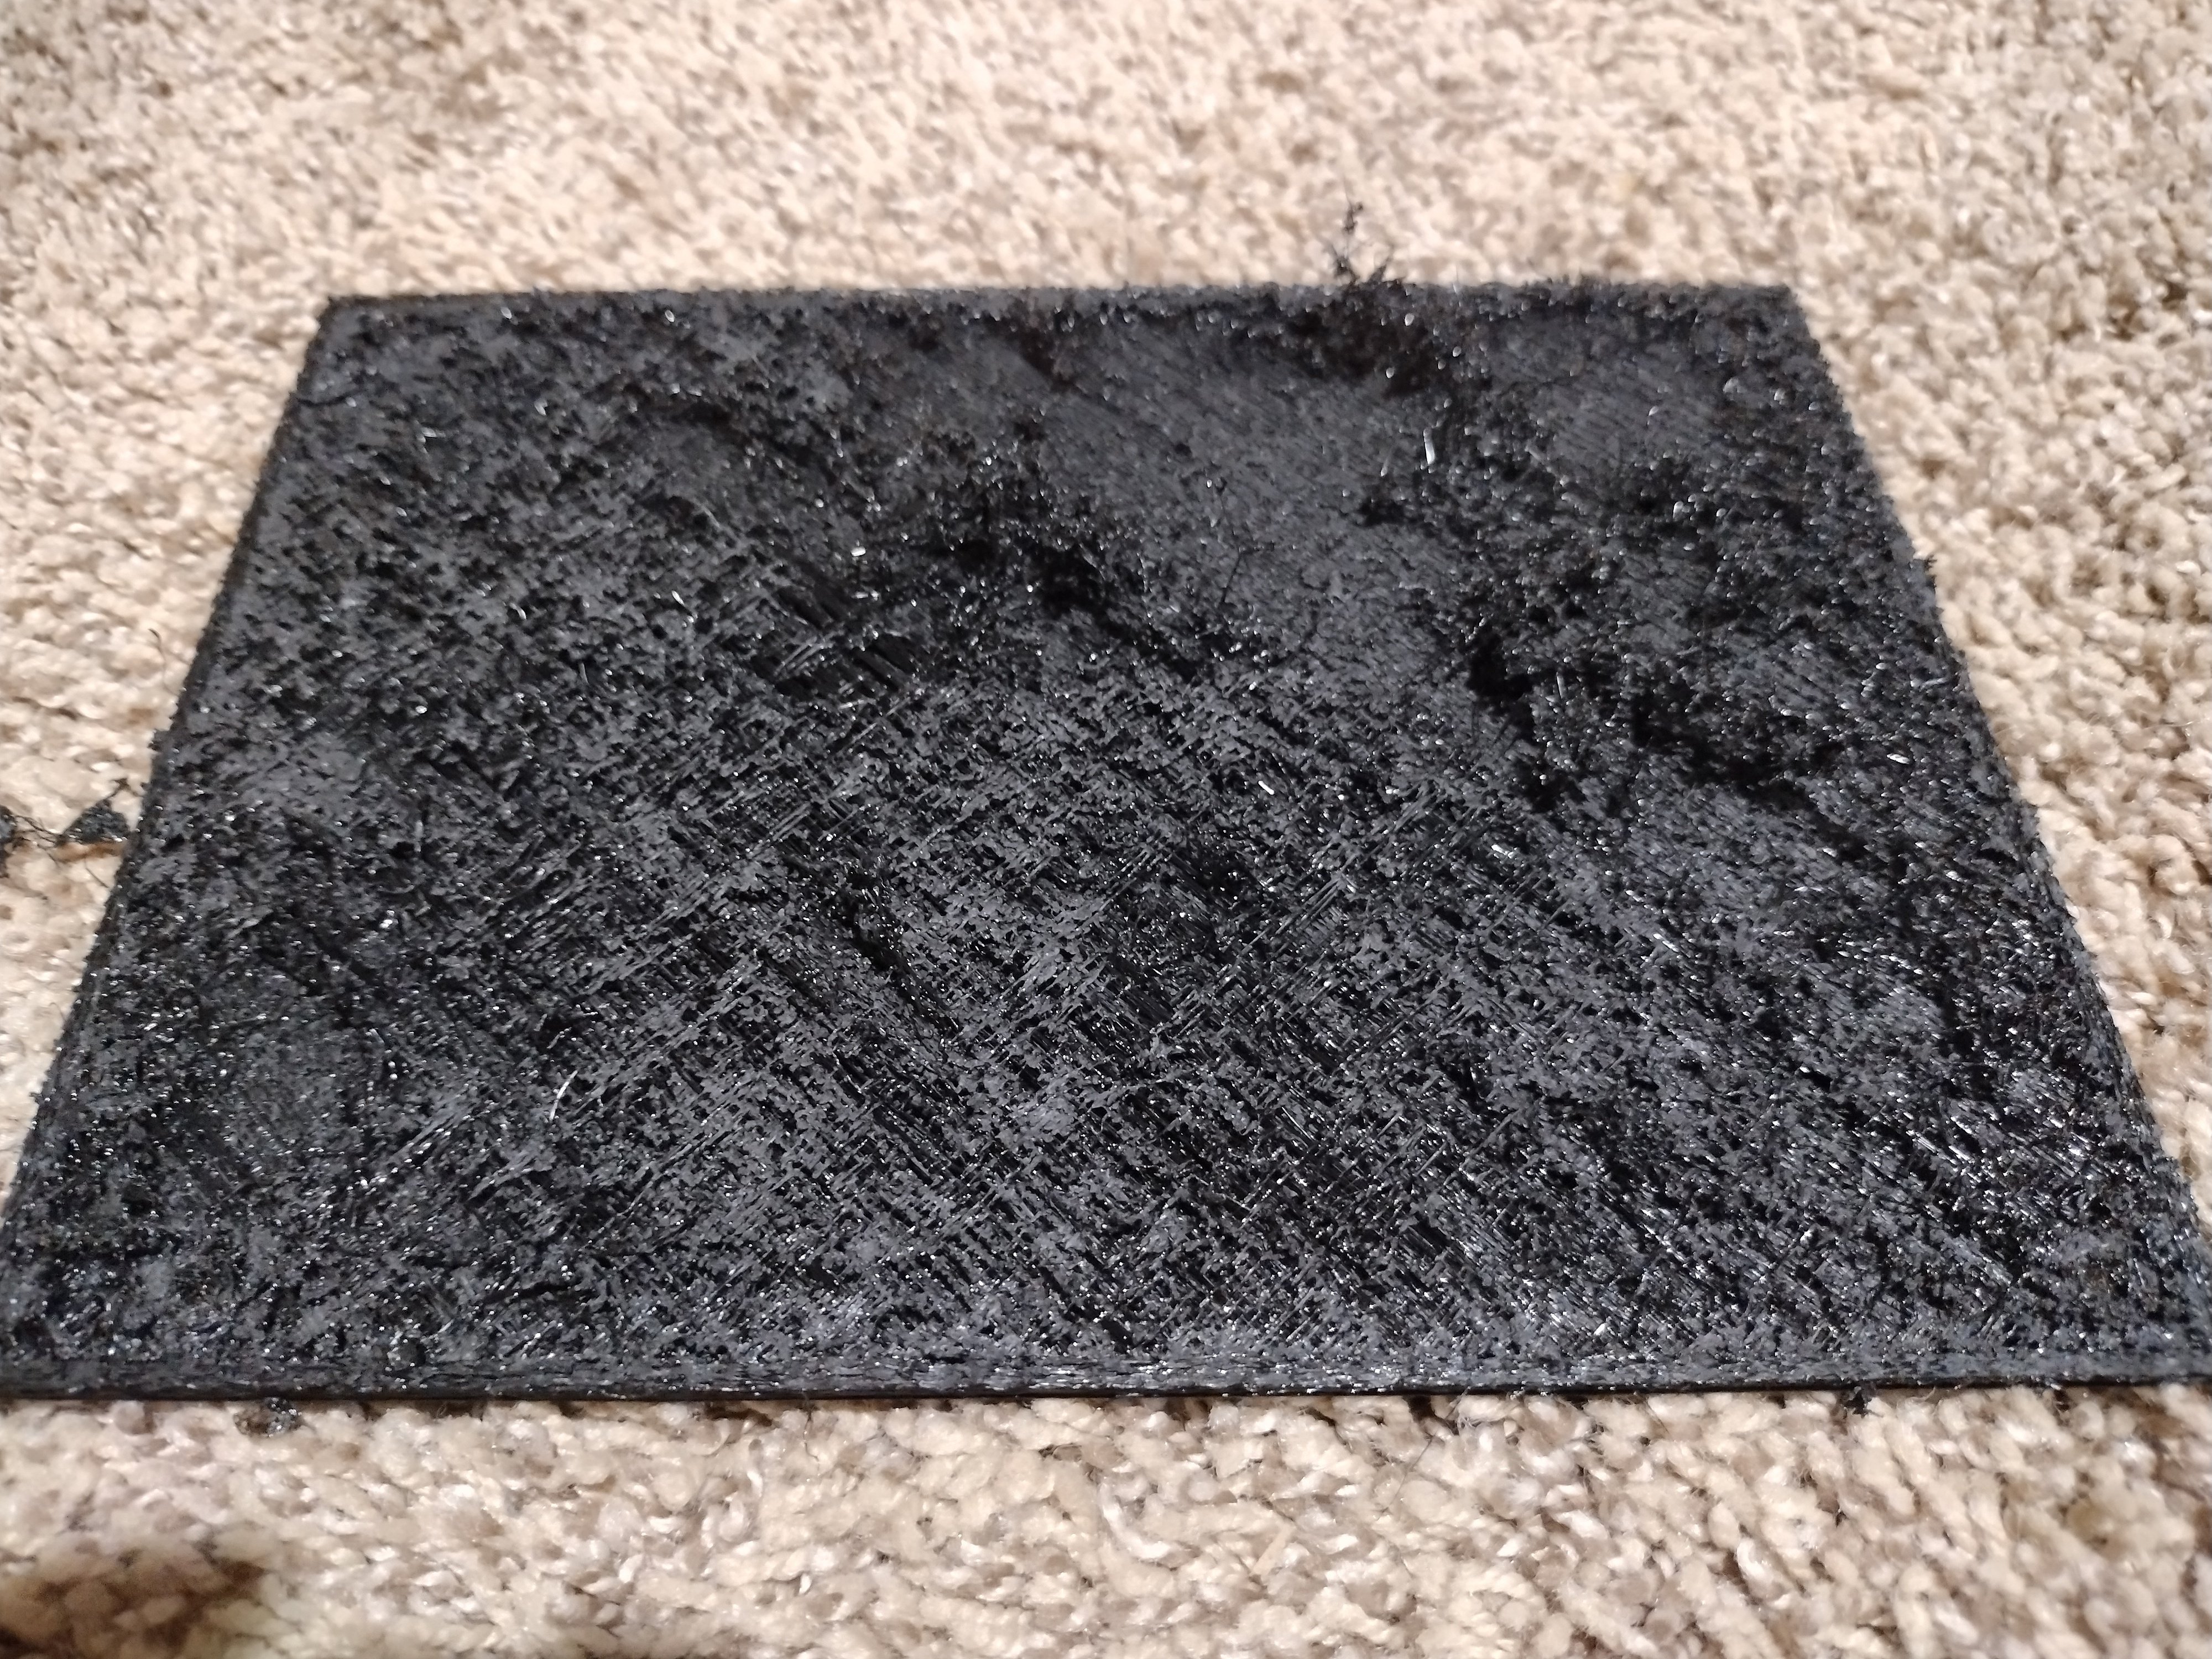
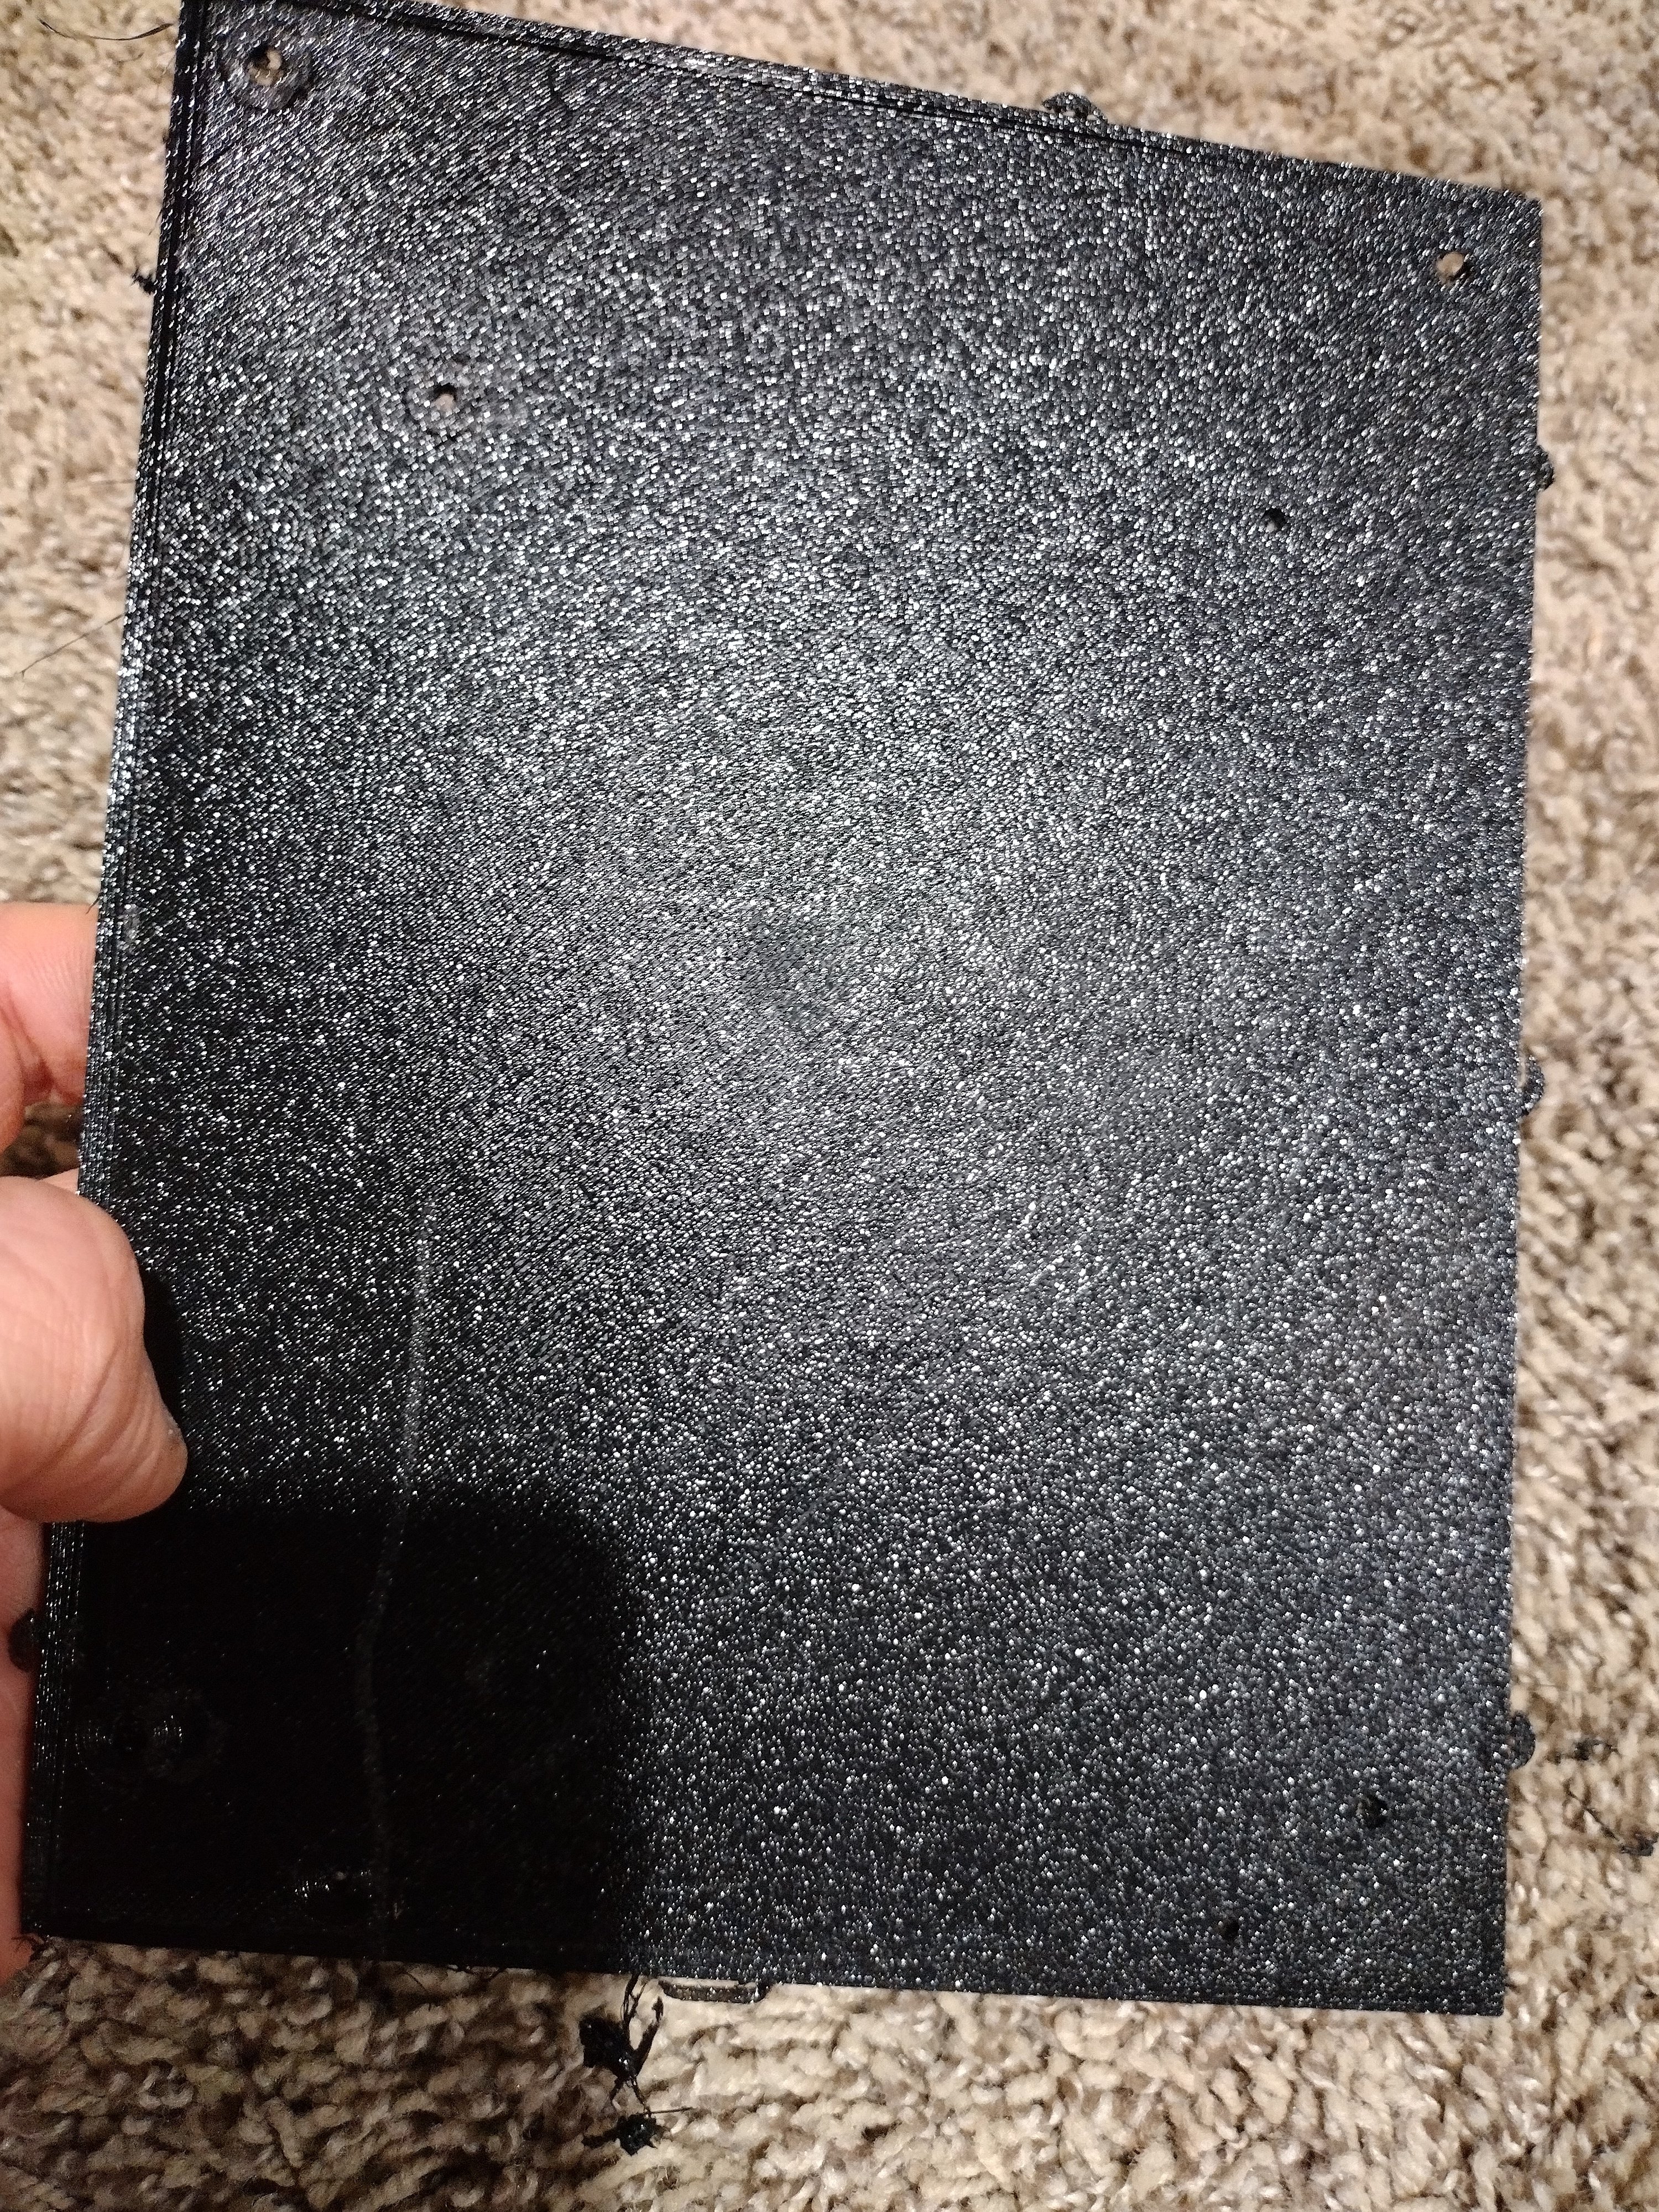
Hey y’all, I managed to hack together a printer from scratch and I’m struggling to get it to print well. It’s a CoreXY system that’s being controlled by a Octopus 1.1. Dual z screws, the works.
I have it moving under it’s own power and all. It’s able to actually print, but the results are atrocious.
I’m just trying to diagnose what’s wrong here.


The bottom/first layer actually looks kinda good. It’s just completely shredding subsequent layers.


Any advice would be appreciated!
Have you verified that you can extrude filament with the extruder stationary and a decent height above your bed? While you’re at it, you might as well do e-steps.
Yep. I calibrated all the e-steps too. Not just the extruder, but the the movement e-steps as well.
Yeah this is a good call to check. Can you even just squirt filament into the air consistently?
Yep! It actually extrudes just fine. I’m starting to wonder if maybe my z axis e-steps are just slightly off and it’s enough to compound over the course of the print. It seems to hit a certain spot and start grinding itself into the print, which suggests that it might not be moving up enough per layer.
It looks like you’re under-extruding and/or clogging. If you can get filament through your nozzle in air, but not while printing, I wonder if you have enough tension on your filament? Extruder emperature variation as you move around might be another possibility. Not moving correctly in z would cause your parts to mushroom and is easy enough to check by homing, moving the nozzle to say z10, and then measuring the gap.
Good luck!
Partial clog, possibly due to not a high enough extruder temp.
Do a few cold pulls and bump your print temp 10
Is your z height calibrated? Is your nozzle dragging as it prints the higher layers?
Is your extrusion calibrated? You may need to bump the extrusion multiplier
I’d be surprised if it was too cold, but I’ve heard stranger. This is PETG at 250. I’ve actually pulled the nozzle and Bowden tube and pushed a very small Allen key through, so it shouldn’t be clogged.
Z height is calibrated, and I’ve calibrated the e-steps for the z axis. I’ve tried disabling the fade height to see if that was doing something but it didn’t seem to make a difference.
I ran through calibrating the extrusion e-steps. It’s feeding 100mm when I tell it to do so. I haven’t messed with the extrusion multiplier, do you have any information about that?
250 for PETG
This is quite toasty, at least for the PETG I print. I’m usually at around 240 for my first layer and 230 or 235 for all subsequent layers.
Have you run a temp tower?
I haven’t messed with the extrusion multiplier, do you have any information about that?
https://ellis3dp.com/Print-Tuning-Guide/articles/extrusion_multiplier.html for more info. In a nutshell, you lower it for oozie filament and increase it for more viscous filament. For PETG I lower it some, but the exact amount varies by filament brand and color.
That said, I don’t think this is your issue.
I haven’t run a temp tower. I’m not fully convinced that it won’t damage itself so I’ve been trying to think through it before trying another print.
If you are suffering a clog and/or under extrusion issue the worst I’ve ever seen happen on my printers is the extruder clicking because the e-stepper is trying to step, but can’t. It might not be a bad idea to go over all the connectors in that path. When I finished building my Voron one of the factory terminals in the LDO stepper’s connector had a terminal that was backed out, causing weird extrusion issues.
The print before this one, the blobbing/shreds were tall enough that one grabbed the BLTouch probe and bent it a little. I was pretty mad about that tbh.
I’ll double check my connectors. That’s a solid shout actually.
You only calibrate E, calculate for XYZ.
Calculate the rotation distance for the Z, if it doesn’t move the correct distance when asked you have a broken part.
Because I hate when people ask questions and never go back to update their original post when they solve the issue, I’m gonna post an update here and now.
The fix was actually surprising but simple. I ended up moving the second Z axis lead screw carriage mount a bit further towards the motor. That is, the piece that supports the build plate, where it connects to the leadscrew.
Further diagnostics ended up showing me that it was binding, and one of the problems I had later on was that it was binding but only when going up. So I ended up having prints that got progressively more and more stretched out along the z axis.
Moving it to be further in line and loosening a few mount screws to allow the nut to come back to vertical got me to where I needed to be. Hope this helps!
Have you done a full calibration? If not, start and work the process. Take your time with it, do each step multiple times. Being a home brew printer it’s going to be very beneficial to get OCD about things. Make sure the frame is square and rigid, the axis are all square to each other, and nothing shifts.
teaching tech has a good guide on it,
You z-step might be off. I.e. z is moving too far each layer.
I realize I’m reviving a super old post here, but I actually did end up figuring out what it was. I posted a little writeup in here if you’re at all curious. You were actually kinda close.
I think you might be onto something but the other direction. I think it’s not moving quite enough per layer.
You could try moving Z to +100mm and just measure with a ruler to make sure it’s at least in the correct range.
I think I’ll give that a swing. Thanks for your input!
New Lemmy Post: Troubleshooting a fully custom build (https://lemmy.world/post/10891152)
Tagging: #3dprinting(Replying in the OP of this thread (NOT THIS BOT!) will appear as a comment in the lemmy discussion.)
I am a FOSS bot. Check my README: https://github.com/db0/lemmy-tagginator/blob/main/README.md


